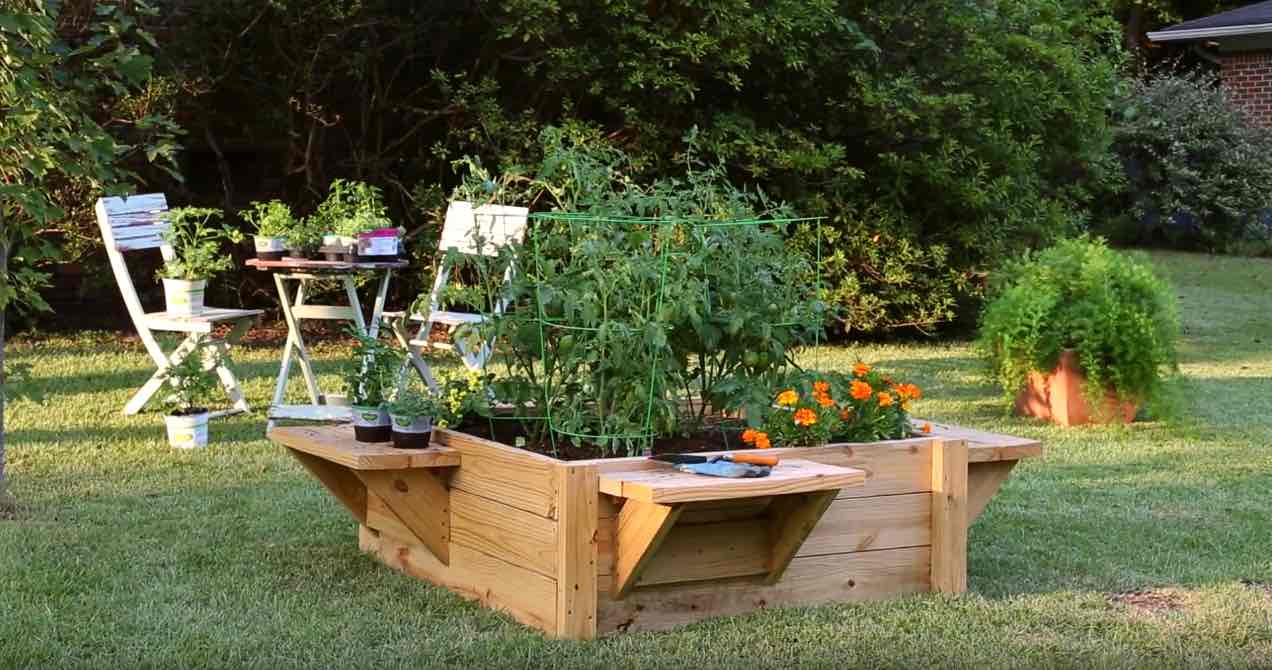
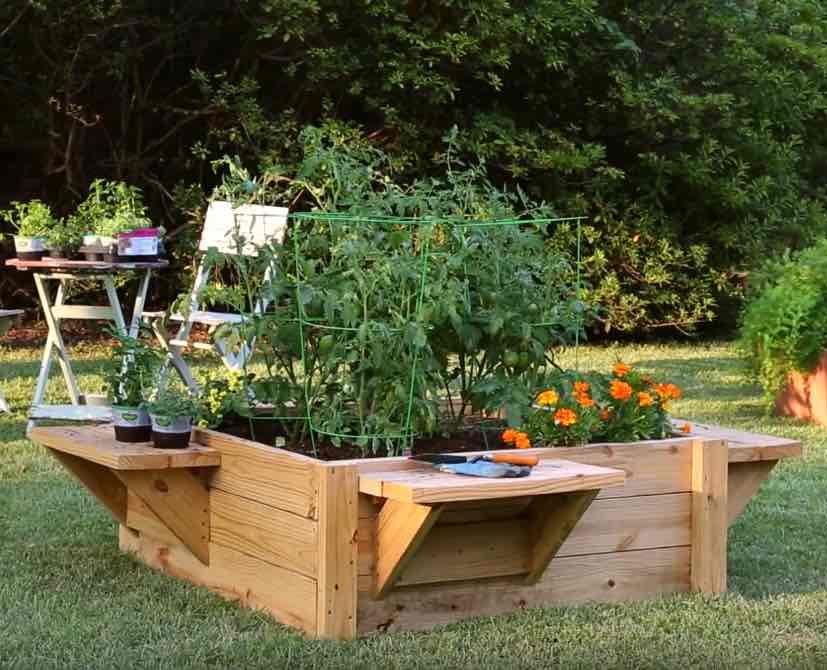
Build a raised bed with benches for your garden makes gardening work more comfortable and simple.
If you have experience in carpentry you can cut the wood yourself, if not You can buy the pieces already cut to size.
Build a raised bed with benches
In fact, so that your work is perfect we will give you some important recommendations.
Choose a well drained and even ground to build your bed, You must also be sure that you receive at least 6 or 8 hours of sunshine every day.
Cover the floor inside the bed with newspapers to avoid weeds, this must be done before placing the soil.
It is a project that you can do in maximum 4 hours, if you buy the cut boards it will take you much less.
It has a medium difficulty and an accessible cost, it can vary depending on the type of wood you choose.
Necessary materials.
- To start you need a 2 x 2 x 8 table
- In addition 3 tables of 2 x 4 x 8 and 8 tables of 2 x 6 x 8
- You must also have 2 tables of 2 x 8
- You need 3 boxes of 2½ inch cover screws.
- In addition to 1 box of 3-inch platform screws.
Tools needed.
- To start a miter or circular saw, if you are going to cut the wood.
- You also need a drill, tweezers and a square.
- In addition tape measure.
Instructions.
- The first thing to do is assemble the sides by placing two side slats and a lower side slat.
- Then flush two internal posts 13 ½ inch from the ends and 1 ¾ inches from the bottom edge.
- Then fastened with platform screws.
- In this way repeat to create three more assemblies, using two side slats and a lower side slat. In addition two interior posts. Finally divide the four sets into two sets of two.
- Now place a support to each set of sides, fixing with cover screws.
- Then place the brackets, they should be 4 to each aligning them against the attachment and support ends with cover screws.
- Now place the bracket to the second set of sides thus fixing it with cover screws.
- Now turn the assembly over and place the end posts thus fixing with cover screws.
- Place a seat bar on each assembly flush with the ends. Now place a seat cove on each one, fixing it with cover screws.
- Working with the sides the next step is to place a second seat bar.
- Then place a seat cove on each one, then a ribbon on each one fixing it to the seat.
- Then place a second slat on each seat and then place the side assembly without end posts and also a side assembly with posts.
- Now check that the ends of the side slats fit flush against the outer posts and fasten with a 3-inch platform.
Detailed instructions: bonnieplants.com


Comments
comments
