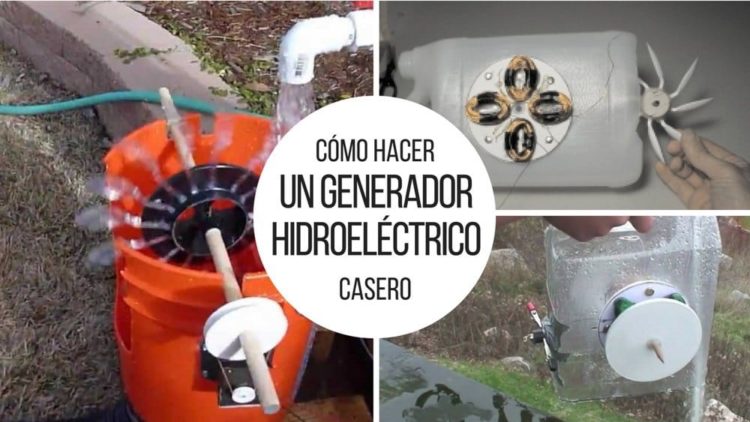
Today we will learn the project to build a homemade hydroelectric generator. Hydropower is one of the main sources of renewable energy in the world, representing a fifth of the world’s electricity.
There are two methods of making a home electric generator, either using a dynamo or building our own generator.
A generator has two parts:
- The stator, the part that does not move and is equipped with the coils to collect electricity.
- The rotor, the part that moves and that has the magnets that induce electricity in the coils.
How to make a hydroelectric generator.
The first thing we will do is print the discs that you can find here.
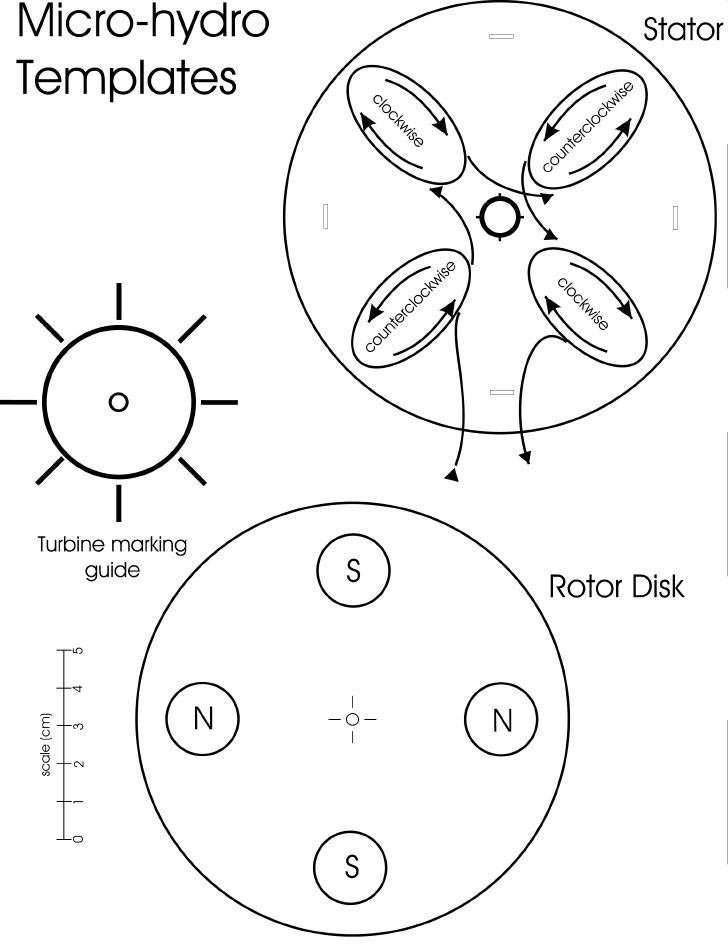
This plane will stick it to a piece of corrugated cardboard, trying not to form lumps when gluing it. With the help of a cutter, we cut the rotor and the stator.
We will make a small hole in the center of the rotor using a nail, larger in the center of the stator (specifically the size of the circle that is drawn).
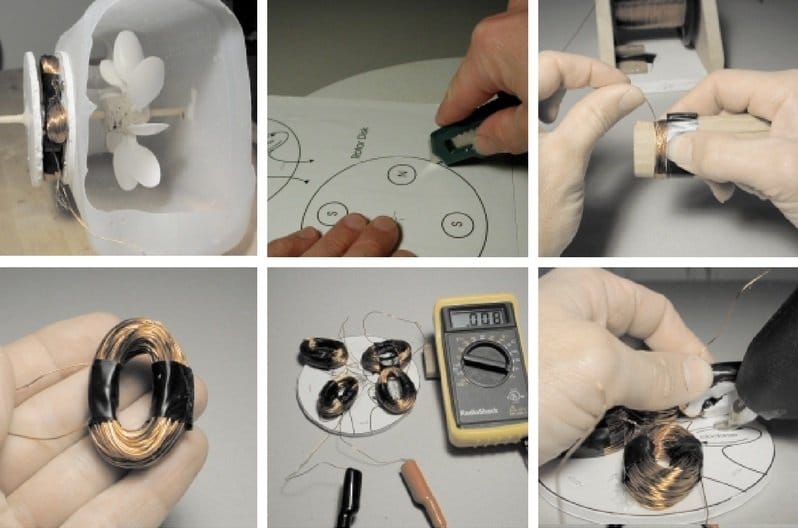
Fold a piece of cardboard 3 x 16 cm in half and pass insulating tape around to keep it that way. This cardboard will be our guide for making the coils.
Prepare 8 strips of 4 cm of electrical tape before the next step. Wind the enameled copper wire through the guide to form the first coil so that it has about 200 turns, but not before leaving about 10 cm uncoiled to be the connectors.
Carefully remove the guide from the coil and use the pieces of electrical tape to maintain the shape of the coil. Scrape the enamel from the tips of each wire with an sandpaper (approximately 1 cm from each tip). Make sure that that portion of the wire is completely free of enamel. Repeat the above steps to make three other coils.
Construction of the coil.
Place the coils on the stator disk, respecting the direction indicated by the template (two coils in coils clockwise and two counterclockwise). Join the cables in such a way that the current can follow the path indicated by the arrows, starting with the anti-time coil on the lower left side. The connection of the cables must be done by winding the enamel-free sides of each coil. Place electrical tape to cover the connections.
Verify that your connections are correct by measuring the resistance of the circuit with a multimeter. If the connections are well made, the resistance should be small (<10 ohm).
Once the proper functioning is confirmed, glue the coils to the stator using silicone. Wait for the silicone to dry before placing the next coil.
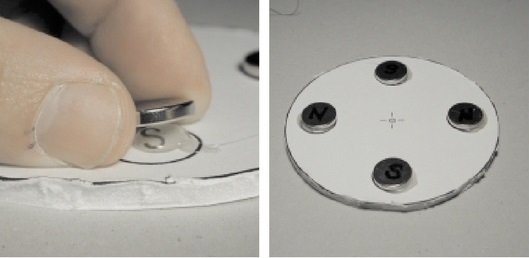
Get 4 ceramic or rare earth magnets of about 18 mm in diameter. Using a magnetic compass determines the polarity of each side of the magnet and marks the north pole of two magnets and the south of the other two.
Glue the magnets with silicone so that the polarity alternates (N-S-N-S). The position and polarity are described in the rotor sheet.
We will make the shaft with a wooden shank of 20 cm x 1/4 ″. We will tip the tarugo with a blade.
Turbine construction
To build the turbine, we must drill the center of a 3 to 5 cm cork with a 1/4 ″ drill. Place the cork on the template and using a pen mark the places where the spoons will be placed.

Using a razor, pierce the marked places. Cut the handle of 8 plastic spoons leaving a centimeter of mango. Insert the spoons in the cork and adjust the angle and depth of each spoon so that they are spaced and have the same angle of inclination in relation to the cork. Silicone glue the spoons in the cork.
Get a 4 liter carafe of rectangular shape, cut with scissors or razor the bottom as seen in the photo.
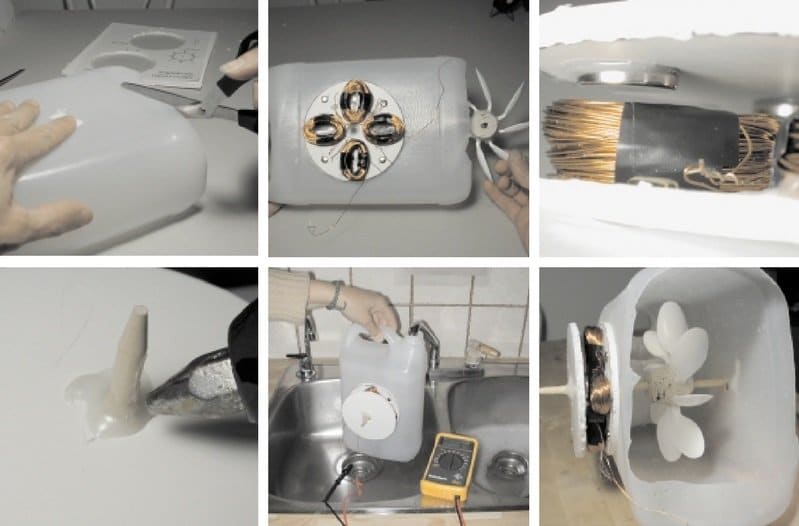
Using a ruler, find the center of one of the lateral sides. Mark this point with indelible down. Repeat the work on the opposite side. Drill both sides with a 1/4 ”hole in the mark you made.
With the help of bed bugs, secure the stator to one side of the container in such a way that the center of the stator coincides with the center of the container.
With the help of a scissor cut 2 pieces of 1 cm each of a 1/4 ”PVC pipe. Pass the tube through the center of the plastic container and the stator and shaft as shown in the figure.
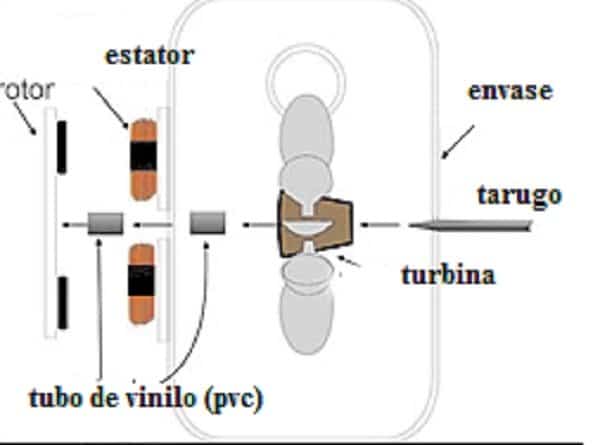
Insert the plug through the turbine and the container as seen in the previous figure. Position the turbine inside the container so that the spoons are under the bottleneck. Also adjust the position of the vinyl tube so that they do not touch the inside of the container. Now place the second tube after the stator. The tubes will help keep all parts of the turbine in position when it turns. Turn the turbine to check that the turbine does not hit the inside of the container.
Insert the rotor into the shaft. The magnets should be about 2 or 3 mm from the coils. Turn the shaft to check that the magnets do not hit the coils. Adjust the angle of the disc if necessary.
If the rotor turns smoothly, fix the position of it by placing hot silicone on the plug.
Place the container near a pipe and spin the turbine with water. Measure the energy you produce with a multimeter.
Note: If you decided to use the dynamo, replace the rotor and stator with it.
Here are some related videos:
Via re-energy.ca

