Table of Contents
READ ALSO


A skull design can be used to decorate your room with angry designs, make a pirate flag or as your imagination asks! And the coolest thing is that you can have a skull design and customize it according to your style! To make it look amazing, in this umCOMO post we explain how to draw a skull step by step.
Follow the instructions below and the result will be an amazing skull design made by yourself! It’s very easy to do and you only need a pen and paper. Try it and you’ll see! Draw many skulls, of different sizes and styles and tell us how it looks!
Steps to follow:
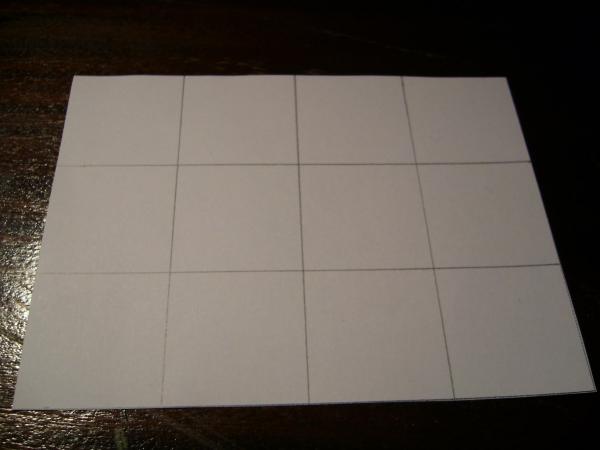
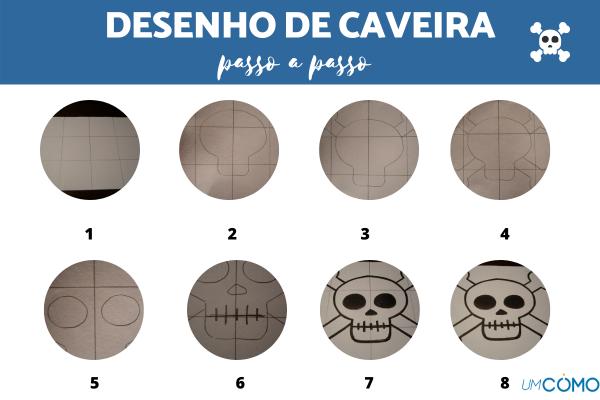
1
For the skull design, make a table with 4 horizontal squares and 3 vertical ones. The squares should measure 4cm x 4cm. Observe the image below.
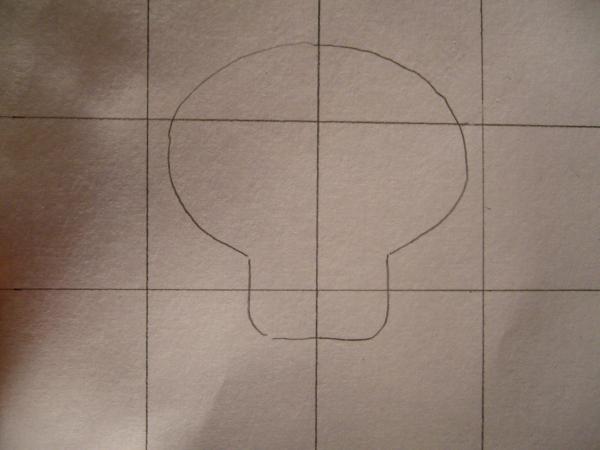
2
Draw the outline of the skull. Look at the image and make sure you center the drawing well.
3
Draw the two bones from the top of the skull design. Observe the photo.
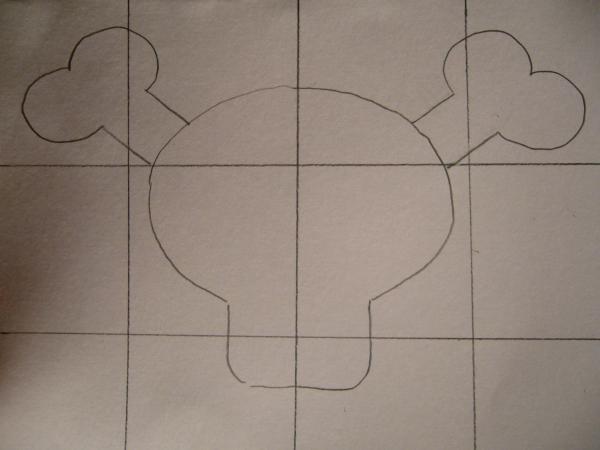
4
Draw the other two bones.
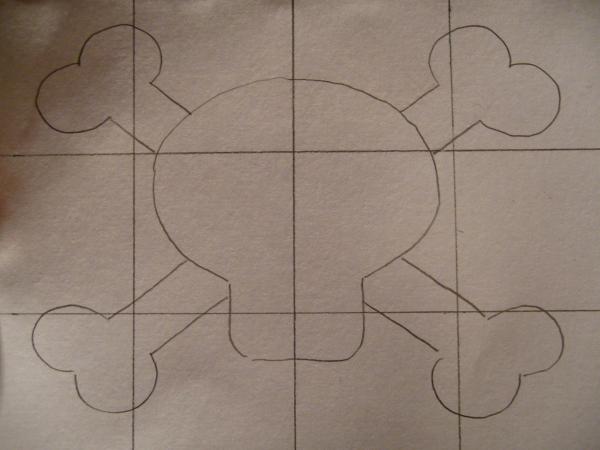
5
Draw the eyes of skull. Skull designs always have very big eyes.

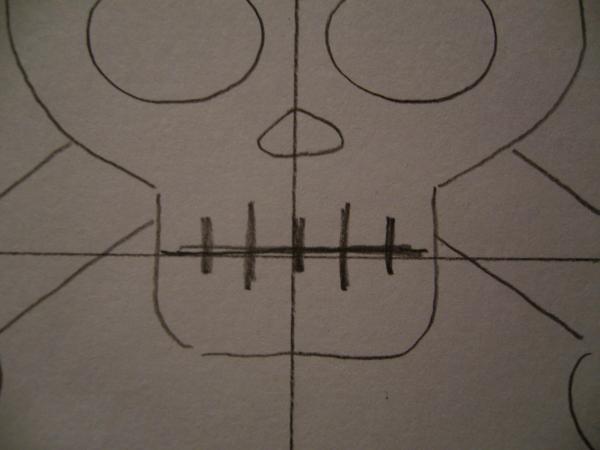
6
To finish, draw your nose and mouth. Now you have your skull design.
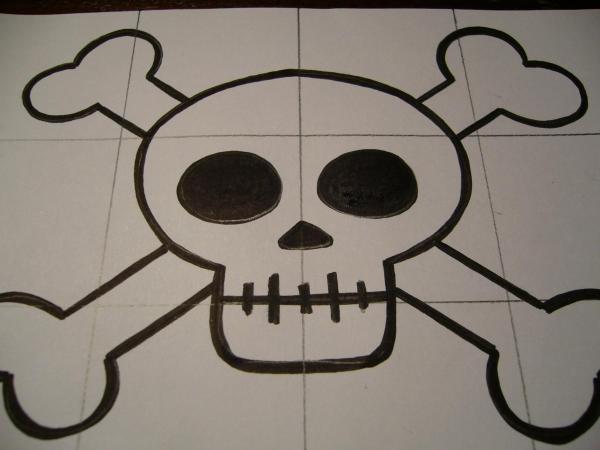
7
Go over the drawing with a black pen. Notice that the eyes and the nose are painted on the skull in black.
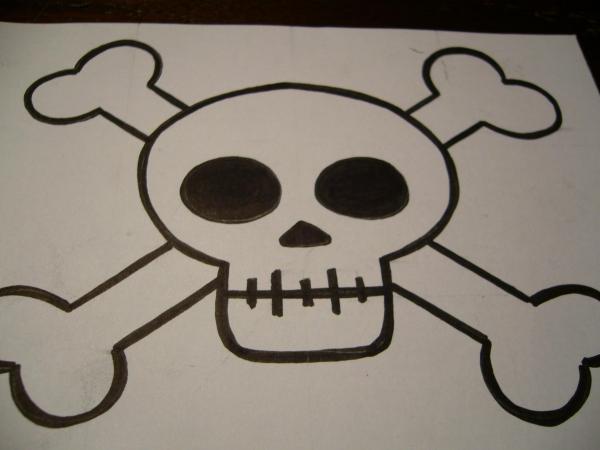
8
Erase the lines in pencil and you’ve finished the skull design.
9
Videos related to How to draw a skull
Videos related to How to draw a skull


